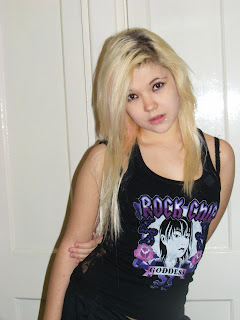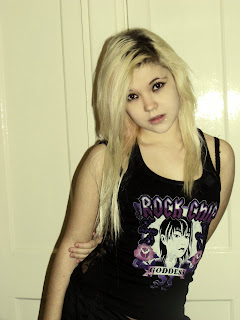

For this photo I decided to try a very obvious rock feel shown by the mock innocent pose and vest top that literally spells it out to the reader that she is a rock model. However I found the pose and the costume to be too obvious and therefore very amateur and low quality therefore I will not be using this photo.
1) 'Enhance -> auto levels' - the program automatically corrects average issues of the level of contast/lightness and tonal so I don't need to worry about it.
2) 'Enhance -> auto contrast'- the program automatically fixes the contrast levels so i don't need to worry about it.
3) 'Enhance -> Adjust lighting -> shadow/highlights'- I slightly increased the light and the dark tones to make the the image more clearer with better lighting/tones.
4) 'Adjustment layer (hue/saturation)-> photo filter x3- I adjusted the colour of the image giving it slight orange, black and yellow/green hues to make the location and the model look visually more appealing fixing the quality of the skin tone giving it an overexposed look.
5) 'Burn tool' - I used the tool to darken the models eyelashes and eyeliner to bring attention to her eyes emphasising her challenging/questioning stare. I darkened the models roots to support the overexposed effect.
6) 'Blur tool' - I used the tool to smooth out the models skin to fix any blemishes or textures that were an issue.
No comments:
Post a Comment